Showing posts with label Gubbinz. Show all posts

Thursday, December 11, 2025

Gorkamorka Firecar Mk II


Firecar Mk II

I've been slowly working on a few projects over the last few months and one of them is finally finished. I've converted my second Ork Wartrakk...again. It's been missing a wheel since my then-five-year-old got his hands on it, but there were always a few other things I wasn't completely satisfied with after I finished converting it. The front fenders were a bit underwhelming, the weapon mount put the scorcha above the gunner’s head, and despite being quite tall, it didn’t really feel as boxy as I wanted. So I decided to tackle all these issues at once.

New wheels for the trakk

The first step was getting some new wheels. One of the reasons used the same standard wheels as the one on the front of the Wartrakk was because they were one of the standard 40K wheel sizes, which meant you could easily order replacements from Games-Workshop. But then GW stopped selling them, so I had to come up with a different plan.

To replace the wheels on my little firecar, I eventually landed on the wheels from the Genestealer Cults Achilles Ridgerunner. These ones were quite a bit bigger than my previous wheels, which would require some redesigning.

Disassembling the trakk

I didn’t want the whole vehicle to tilt backwards, so I’d have to elevate the rear enough that it tilted forward instead. To do this, I decided to build my little trakk a proper undercarriage, like the one my big trakk. I also probably went a bit overboard with my dismantling and ripped off a few bits that I probably should have just left alone. Oops.


New ork trakk frame

I made the basic frame of the vehicle with some long plasticard strips and some H-beams. I also added a ram mount on the front. I also put some brass rods in the Ridgerunner wheels to make them detachable.

I also built a ridiculously large transmission for the track out of a piece of a soap dispenser, 

Building the tracks for the trakk

In order to have the trakk tilt forward, I had to drop the tracks below the rest of the frame, so they ended up basically turning into their own subframe. I used some brass rod to make some sturdy axles that wouldn't get bent or broken during normal use and I used part of a plastic twist-off cap (similar to those on a Squeezit cap) to make the differential.

Of course, while the brass axles themselves were pretty strong, I didn’t want those plastic joints supporting all the shearing stress on the bottom of the vehicle, so I cut some plasticard I-beams to connect the two sides.

Connecting I-beams at right angles was a bit tricky, but I just cut off the top and bottom of one beam so that they lock together tightly and ended up with a really great connection.

To connect the two subframes, I decided to model some pistons to look like a hydraulic suspension or adjustable traction bars. This would involve connecting tubes at some weird angles, so I started off by using some other bits of tube to make some connection points on the main portion of the frame that stuck out just beyond the flanges of the beams. I then chopped up some square tubing to make a C-shaped brackets on the track subframe.

A few little tubes at weird angles wasn't much to support the weight of the vehicle, so I decided that I needed something in the middle transferring the weight straight down. 

My initial plan was to create two more, even smaller pistons to squeeze into the spot between the two frames, but they were just way too flimsy. Instead, I decided to create some springs out of some plastic worm gears.  This meant that I could run some brass rod through the middle of the gears and solidly pin the two halves together. 

Connecting the two subframes

The hard part was cutting the worm gears at an angle to match the upper frame. They're made of some pretty hard plastic and trying to cut them at an angle across their threads just made them want to spin. But eventually I managed to get them cut and they worked great!

Firecar undercarriage

The little suspension bars were surprisingly difficult to attach. Trying to hold them at the correct angle and extend them to the proper length when I couldn't even get my fingers in there was incredibly difficult. I used superglue and baking soda to get a quick bond, but even then I don't know how I kept them in position long enough to glue it all together.

Firecar Engine

The next step was making an engine for my little firecar. I used the engine from the Mek Workshop and simply cut away the chains that were attached to these bits. Taking inspiration from some of the crazy vehicles you see at tractor pulls, I made a little gearbox to go beneath the engine and ostensibly connect it to my oversized transmission below.

I also made some exhaust pipes out of plasticard rod. Working with such tiny tubes at very precise angles was challenging, so I ended up first cutting out some little plasticard guides and then gluing the rods to them. I could then maneuver all the pipes together and sand them down to the correct angle to attach to the engine block. I then sanded off the guides as best as I could, so the underside of the pipes is pretty messy, but they look good from above.

Firecar roll bars

The next thing I decided to add were some roll bars around the driver. I also magnetized his seat, which made getting him in and out so much easier.

I also rebuilt the gunner's platform that I'd torn off and added a spot to add some gubbinz like a big grabba or a wreckin' ball.

At this point, I put things on hold for a bit to take my updated Firecar on a test drive. I played a short campaign with Cygnus and his brothers, which included my scorcha trakk going up against his scorcha buggy. 

My scorcha trakk vs Cygnus' scorcha buggy

This particular encounter ended with both vehicles basically immobilized and their crews hopping out to beat each other up. Good times.

New fenders

Once I got back to converting, the next step was making some new fenders. I spend a good deal of time sanding the joints to give them more of a smooth curve than the old ones had.

Airbrushed Undercarriage

Before I stuck the two subassemblies together, I decided to airbrush them to make sure I got all the fiddly details painted. This ended up taking much longer than anticipated due to my airbrush being clogged and me accidentally shooting the nozzle across my kitchen while cleaning it.

Trakk buggy primed

Fortunately I did eventually get both halves painted and glued together properly. I made sure to mask out a few of the details that still looked good, as well as the connection points so I could stick them together with plastic glue.

Front shocks

I was also now able to add the front shocks that came with the Ridgerunner wheels and axle. Some very cool little bits.

Painted ork trakk buggy

I then painted up the trakk in my mob's classic Goff paint scheme, adding plenty of cheques where I could.

Gorkamorka Ork Trakk with Big Grabba

I'm pretty pleased with the finished result. My little firecar turned out nice and boxy like I had originally intended, without being any longer than it was before. And I can easily mount my second Big Grabba on it, which could be fun.

Gorkamorka Ork Trakk Buggy with Big Grabba and Ram

The ram mount on the front is also compatible with the ram on my big trakk, but it looks pretty ridiculous on my tiny trakk buggy, so a new ram is now on the list of future projects.

And if you want an even more in-depth description of the conversion process, I have a new video up on my YouTube channel.


Monday, January 4, 2021

Fort Construction: Workshop


Gorkamorka Mek Workshop

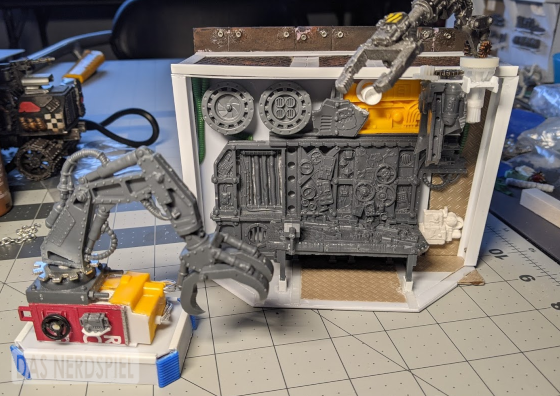
Another big section of the fort is finished. This one is the spanners' workbench and tools, including some nice hydraulic arms. I probably went a bit overboard with the cables and the ductwork, but since the workbench itself was so detailed, I wanted the rest of the room to look like it matched.

As you can probably tell, most of this wall section is just built from the Mekboy Workshop terrain set, though it did take a bit of work to take the freestanding workshop and build it into the existing wall of the fort.

Converting the Mekboy Workshop

The biggest part was flipping the main wall of the workshop around and installing the bench on the wrong side. I decided to make the more detailed side of the piece face forward, since the other side would be glued to the wall. The piece is fairly symmetrical, so I really only had to carve some holes for a couple of wires and pipes to get the bench to sit (mostly) flush with the wall.

Converting the Mekboy Workshop

I ended up grinding off the back half of the wall to better attach it to the fort, so the workbench is now at a slightly odd angle. Plenty Orky, though.

Gorkamorka Mekboy Workshop

Nice to see that the Orks keep their workspace as tidy as I keep mine.

Gorkamorka Fort Hydraulic Motors

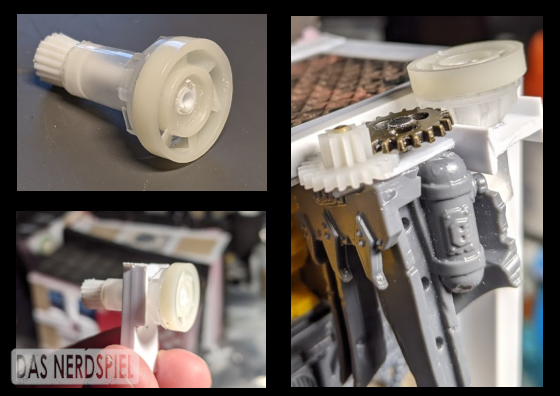
Since the Mekboy Workshop came with a big hydraulic arm and I already had another as part of the gubbinz for my big trakk, I wanted to make some spots around the workshop where the arms could be installed. I went a little overboard making the mount for the arm, adding as many motors, compressors, and gears as I could fit into the tiny space I'd allotted myself. Though I guess going overboard is kind of on par with the rest of the workshop.

Gorkamorka Fort Hyrdaulic Arm

I was originally going to mount the second arm on the floor right next to the workbench, but that didn't give me much space if I wanted to make sure that this piece still fit together nicely with the other fort walls. Also, there was already more than enough detail crammed in this little section, so it couldn't hurt to spread it out a little bit.

I ended up making a little freestanding platform for the arm to sit in. I modeled it mostly on the assembly line platforms you see in car manufacturing plants, which seemed appropriate. I also had to pack more lead weights into this little thing than any other part of the fort just to keep it from tipping over when the arm swung around. Turned out pretty well, though.

Only a few more sections and this thing will be ready for some paint.

Monday, October 8, 2018

Gubbinz: Reinforced Ram

A converterted reinforced ram for Gorkamorka

The first gubbinz that I started working on after our mini-campaign were also the last ones that I managed to finish.  My reinforced ram, though fairly simple conceptually, ended up being much more difficult to pull off that I had expected.  The idea was simple enough.  I was going to start from a Chimera dozer blade and bulk it out with Orky bits until it looked less functional as a plow and more like something that was just used to smash into things.  I was envisioning something like the Battlewagon ram, but a bit more boxy.  Simple, right?

The first few steps went very smoothly.  I glued the dozer blade to the trunnion and then carefully cut across the push frame where it would meet the undercarriage of the trakk.  I then drilled out both sides and inserted some sturdy brass rod into the blade side.  Since this would be sticking out in front of the trakk and could be relatively large compared to some of my other gubbinz, I wanted to make sure that it didn't snap off if it got caught on a piece of terrain or something.  To make it secure, however, I couldn't just have a strong connection between the blade and the frame, I also had to have a strong bond between the push frame and the undercarriage of the trakk.  While there are lots of bits under there that I could have potentially glued the ram to, there were no flat surfaces where I could get a good bond.  Just lots of bolts and rods, all at different depths.  I decided that the best move would be to gently clip away a bit of the detail to make some flat, level places where I could attach the ram...

The broken axle from my trakk

...I didn't do such a great job.  I ended up accidentally breaking the front axle of my trakk.  Then, while trying to clean up that mess, I ended up breaking some other bits off the undercarriage.

An Ork Halftrakk with a missing front axle

By the time I got all the broken bits removed and everything smoothed off, the entire front of the trakk was gone up to the chassis.  While this was pretty frustrating, it meant that I could make the new undercarriage solid.

A rebuilt axle assembly for my Gorkamorka trakk

The new axle assembly was built with two big plasticard I-beams on the bottom, which gave me a good surface to glue my ram to, even though they would run perpendicular to each other.

The wheels were crooked when attached to the new axle.

Unfortunately, I was never able to get all the bits of broken axle out of the resin wheels, so I just extended the axle wider and drilled new holes into the wheels to pin them with some brass rod.  Despite my best efforts, I didn't drill the holes in the wheels very straight, so the wheels are now really crooked.  On the other hand, I didn't assemble the rear treads very straight either (I'm really starting to dislike working with resin), so the vehicle has never really been able to sit flat, so I didn't worry too much about it.

The Dozer blade for the ram attached to the new axle assembly.

Attaching the dozer blade to the new axle assembly went very smoothly.

Adding plasticard to the chassis to make it even

The hard part would be attaching everything to the chassis.  Even after chopping off all the little greebly bits, it still wasn't a perfectly level surface, so I leveled it off with some plasticard.

Attaching the new front axle to the trakk with plasticard and green stuff.

I actually drilled out four little holes in each side to try and pin the axle on, but trying to line up four tiny bits of wire proved to be way too difficult, so I just glued all the flat surfaces together and filled all the gaps with green stuff.  I then glued more plasticard to the outside to reinforce the bond.  I also made sure to paint the axle assembly before sticking it to the rest of the trakk, since there was no way I was going to be able to paint all those little crossbeams once they were attached.

Gorkamorka Big Trakk with Dozer Blade attached

So after two months of breaking things and trying to repair them, I had finally managed to get the Chimaera dozer blade attached to my trakk, which meant that it was finally time for the converting of the actual ram to begin.

A WIP shot of a converted reinforced ram

The first step was bulking the ram up to a size that looked good on the trakk, which took a bit of trial and error, adding on plasticard and then cutting it back down.  The next step was making it look proper orky.

A WIP shot of a Reinforced Ram for Gorkamorka

I added a bunch of panels to look the finished ram look more cobbled together, then added some ork glyphs and some big toofy bits.  I used a combination of plasticard and glass beads for the rivets, which was rather time consuming, but managed to tie the scratchbuilt bits to the dozer blade.

For the paint job, I decided that I'd first paint it up all bright, shiny and new, then weather the shit out of it to make it look like it'd been smashing through everything in the desert for months.

Painting white over black takes forever

This meant painting a million thin coats of white over the black undercoat...

The reinforced ram with its clean paint job, before applying weathering

It wasn't the cleanest checkerboard pattern I've ever painted, but it was about to get beat to hell, so I didn't mind.

Reinforced Ram, painted and weathered

The finished paint job turned out pretty well.  Lots of washes and thinned down brown paint.  I painted the scratches to look like the ram scraped up a lot of sand and rocks between the teeth of the dozer blade.  I think the finished effect turned out pretty decent.

Gorkamorka Morker Mob riding in a converted big trakk loaded with gubbinz

So after two long years of work, my Morker Mob is finally finished.  There are still a few things I'd like to go back to and fix, such as making the big gunz on all my vehicles interchangeable (and someone got the idea of making a bunch of bikes stuck in my head).  For now though, I'm pretty happy with how Grizwoad and his mob have turned out, so it's time to move on to some other nerd projects.

Friday, October 5, 2018

Gubbinz: Armour Plates

A Gorkamorka Big Trakk with scratchbuilt armor plates

One thing about basing my big trakk off the Forgeworld Halftrakk is that its stripped down design didn't really give me many places to paint in my mob's colors.  I went for sort of an old-school Goff scheme with Grizwoad and Da Chop Squad—black with white checks and a fair amount of red.  Unfortunately, since so much of the model was exposed machinery and engine, the only parts of the trakk where you could really see the paint job was on the door panels on the back of the bed, and those got covered up later with my spiky gubbinz.  When I decided to model some extra armour plates for my trakk, I decided that I wanted to built an entire hood to encase my engine.  That way, I could have a bigger surface to do some Orky paintwork and if it happened to get blown off, you would get to see my spiffy engine bits again.

WIP shot of scratchbuilt armor plates on a Gorkamorka big trakk

Since I imagine the extra armour plates as the mob's spanners just bolting any big hunk of metal they can find to the side of the vehicle, I wanted an appropriately eclectic assortment of materials.  The main body of the hood is built from plasticard with bits from disposable razors and other random pieces of plastic that I had lying around.  Instead of plasticard, I decided to try making my bolts out of tiny glass beads.  It's a bit finicky and required drilling a lot of tiny holes, but the finished effect was pretty cool.  I chopped up some of the panels from the standard Ork Trukk to serve represent taking a second and third armour plate and picked up a pair of the exhaust pipes from the Fighta-Bommer to make someplace for my exhaust to go, since the engine on the Halftrakk doesn't connect with the standard trukk exhaust pipe.  I also built a supercharger for my engine out of the safety cap from a razor.  This was mostly just to make it look cool, but I could also use this to represent the Meks making my trakk fasta if I wanted.

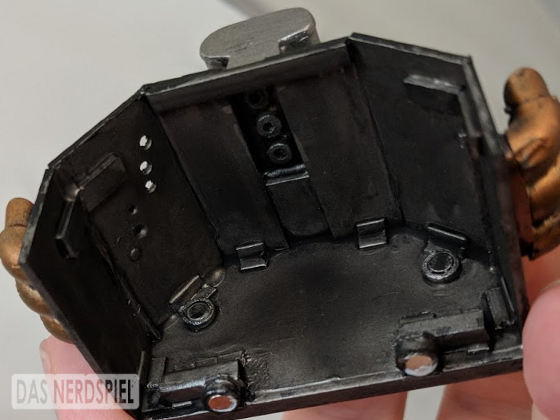
The underside of the hood of the big trakk, showing the magnets and tubes used to hold it on

As with my spikes, the biggest engineering challenge was how to make it attach to the trakk.  The hood had to go right over the engine, but I didn't want to just drill a big hole in the middle of it or glue a bunch of magnets to the side of it.  However, since the intake pipes on the halftrakk engine are just three fairly uniform tubes that stick straight up, I decided to take a set of slightly smaller tubes to fit inside them, essentially balancing the hood on the top of the engine.  It worked fairly well.  my little tubes connecting the engine to my supercharger fit nicely and kept the hood from sliding, but it was still just sort of balancing on top, so it would rock and sway every time you moved it.  Fortunately, this was right when I was experimenting with my plasticard-covered magnets, which worked amazingly.  The hood now snaps into place with a satisfying click and doesn't budge.  I also added two more magnets to hold on the other two armour plates when I'm using them.  As you can see from the picture, I also drilled a few bullet holes to make it look like the armour plates had already seen some action.

Scratchbuilt Armor Plates for Gorkamorka

I like how the finished hood turned out.  Painting the checks was fun, as was trying to give the whole thing a bit of weathering.  I probably could have done a bit more paint chipping, since this is the front of the trakk where all the dust and rocks are going to hit, but I was trying really hard not to go overboard.  I decided to leave the supercharger looking shiny and polished, as if it were the one part of the vehicle that the spanner took extra care of.

A converted Ork Halftrakk for Gorkamorka

It's interesting how the hood changes the overall silhouette of the trakk.  It definitely makes it look a bit boxier, and even a bit front-heavy without all the other gubbinz attached.  I also think that the panels in the front balance the colors out a bit, so all the detail isn't at the very back of the vehicle.

A converted Ork Halftrakk for Gorkamorka

While I was at it, I also went back and touched up the paint job on the rest of the trakk, most noticeably painting the cables on the engine red instead of black, again, to break up the oily gunmetal that makes up most of the vehicle.  You might also have noticed that the front of the trakk has been lifted.  This is because of the last and most time consuming of my gubbinz for this campaign...

Monday, October 1, 2018

Gubbinz: Spikes

Converted Spiky Gubbinz on a Gorkamorka Big Trakk

Like my shoutas, my spiky gubbinz were originally built toward the beginning of our first campaign.  Although they turned out quite well, there were always a few things I didn't like about them.  Most of it had to do with working with bamboo skewers.  Super glue wouldn't hold them to the plasticard, so I ended up using hot glue, which was a pain to do neatly.  The spikes themselves were also a bit rounded and smooth for Ork engineering.  I envisioned them more as hunks of wothless scrap pounded into jagged shards, rather than uniformly milled metal cones.

Plastic skewers cut up to make spiky gubbinz

Fortunately, I was able to find some plastic cocktail skewers that I was able to cut into various lengths and widths, making for more of the feel I was going for.  I actually had to sand some of the edges down because they would occasionally break off sharp enough to actually cut you.  Most importantly, they could be glued on with plastic cement, which meant that I didn't have to mess with hot glue and I wouldn't have to worry about them falling off in the middle of games anymore.

The other major change I wanted to make to my spikes was to magnetize them.  At this point, most of my gubbinz had been magnetized and my spikes were one of the few bitz still rattling around loose.  Due to their placement, however, installing magnets was kind of tricky.  Whereas the magnets in my boarding planks and boosta rokkits were drilled straight into thick layers of plasticard, there were no places I could do the same on the trakk, especially around the cab.  Without contact all the way around the magnet, the prospect of gluing neodymium magnets to plastic becomes pretty dicey.  Cyanoacrylate glue has pretty low shearing strength and it also doesn't bond well to smooth surfaces.  Neodymium magnets also come together with a lot of force, so magnets snapping together can easily shatter brittle connections.
Magnets encased in plasticard sheaths
My solution to the problem was to slice up plasticard tube and encase the magnets in a plastic sheath.  This allowed me to then use plastic cement to glue the little magnetic tubes to other plastic components.  I also put caps on one or both ends which could be used to glue them onto a parallel surface, or to put a buffer between two magnets so as to reduce the impact of them sticking together.  Plasticard gave me the added bonus of a surface that I could write on to mark the polarity of the magnets so I didn't accidentally mount one backwards.  I initially only made enough for my spikes, but I ended up doing the same for the magnets in most of my other gubbinz.  By the time I finished building everything, I'd probably made at least two dozen of these things and I still have a few extras lying around for the next project.

WIP shot of scratchbuilt spiky gubbinz on a Gorkamorka big trakk

The large spike panels in the back I was able to attach simply by making a backplate that connected through the windows in the trakk's armor.  The front panels were more complicated, as there wasn't enough room for a backplate, nor was there a big enough hole for the magnets to pass through.  I ended up gluing the magnets directly to the chassis and then covering them with green stuff, both to hold them more securely and to make them stand out less.

Overall, I think the new spikes are a significant improvement over the old ones.  I'll probably find a few other uses for those plastic skewers, as well.

Tuesday, September 25, 2018

Gubbinz: Mine Layer


The Mine Layer was a last-minute addition to my trakk.  Although a few players had taken one before, no one had really modeled one.  The one shown in the old Gubbinz book was basically just a clamp on the back of the vehicle holding some mines, and most other ones I could find were nothing more than a crate of mines bolted to the rear of the vehicle.  Actual military minelayers aren't much help either, as they just look like a tank with a bunch of tubes sticking in the air.  In the end, I think the closest thing I could find was the caltrop dropper on the back of the Razor Cola in Fury Road, which was sort of a hopper with a big hand crank.  I decided that even though it was operated by the driver, I'd add a big manual release wheel to the unit to make it look a bit more mechanical.

A WIP shot of a scratch built mine layer for Gorkamorka

Since placing the hopper on the bed of the trakk wasn't an option with my massive shoutas, it had to fit underneath the bed.  I was using the big krak bomb from the Ork Boyz sprue as my mines, so the hopper could only be the height of a single mine.  A chute coming out the back would hold the next mine ready to be dropped.

The scratchbuilt Mine Layer hopper installed beneath the bed of the trakk.

The original plan was to have a long tab that went between the bed and the undercarriage to keep it straight and give it some support if it got bumped, then hold it in place with magnets. 

Fitting the Mine Layer assembly underneath the bed of the trakk.

In the end, the tab fit so tightly that the thing didn't budge once it was in place, so I didn't bother with the magnets at all.

The underside of a scratch built mine layer for Gorkamorka

You can't really tell once it's on the table, but I also put in a little gear box attached to the manual release and a little hinged bit underneath connected to the actual release mechanism.  The little prongs holding the mines in place are bayonets from the Ork Boyz sprue.

A WIP shot of a converted Mine Layer for Gorkamorka mounted on a Big Trakk

A few additional details and the mine layer is ready for a coat of paint.

Mine Tokens for Gorkamorka

I also made a couple of mine counters to use in the game.

A scratchbuilt mine layer for Gorkamorka monuted on a big trakk

The finished gubbinz look pretty good.  Not as big and showy as the shoutas, but still detailed enough as befitting gubbinz that cost ten teef.